Steps
Step 1
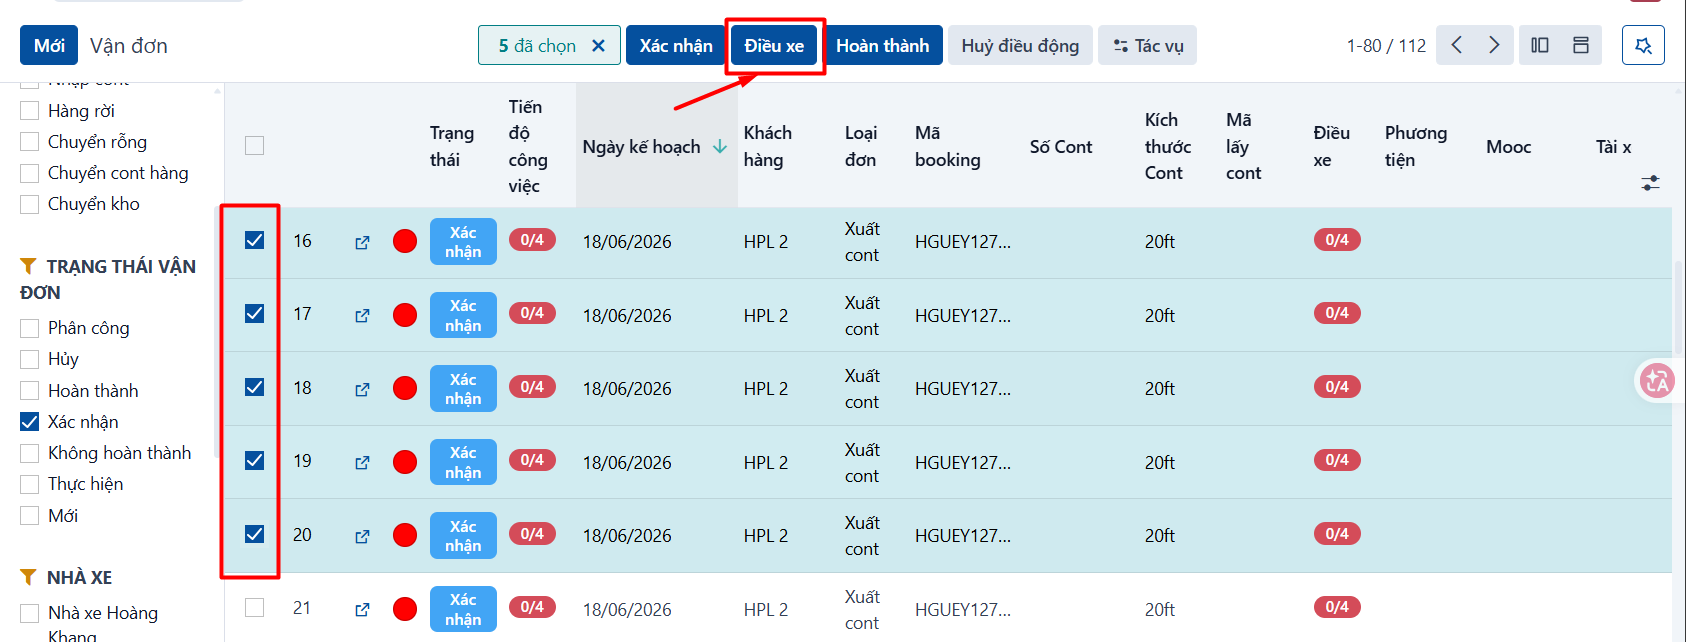
Open the waybill list → tick the waybill you want to dispatch → click DISPATCH.
Note:
One dispatch order can take either one 40ft waybill, or one 20ft waybill, or two 20ft waybills as a container pair.
Step 2
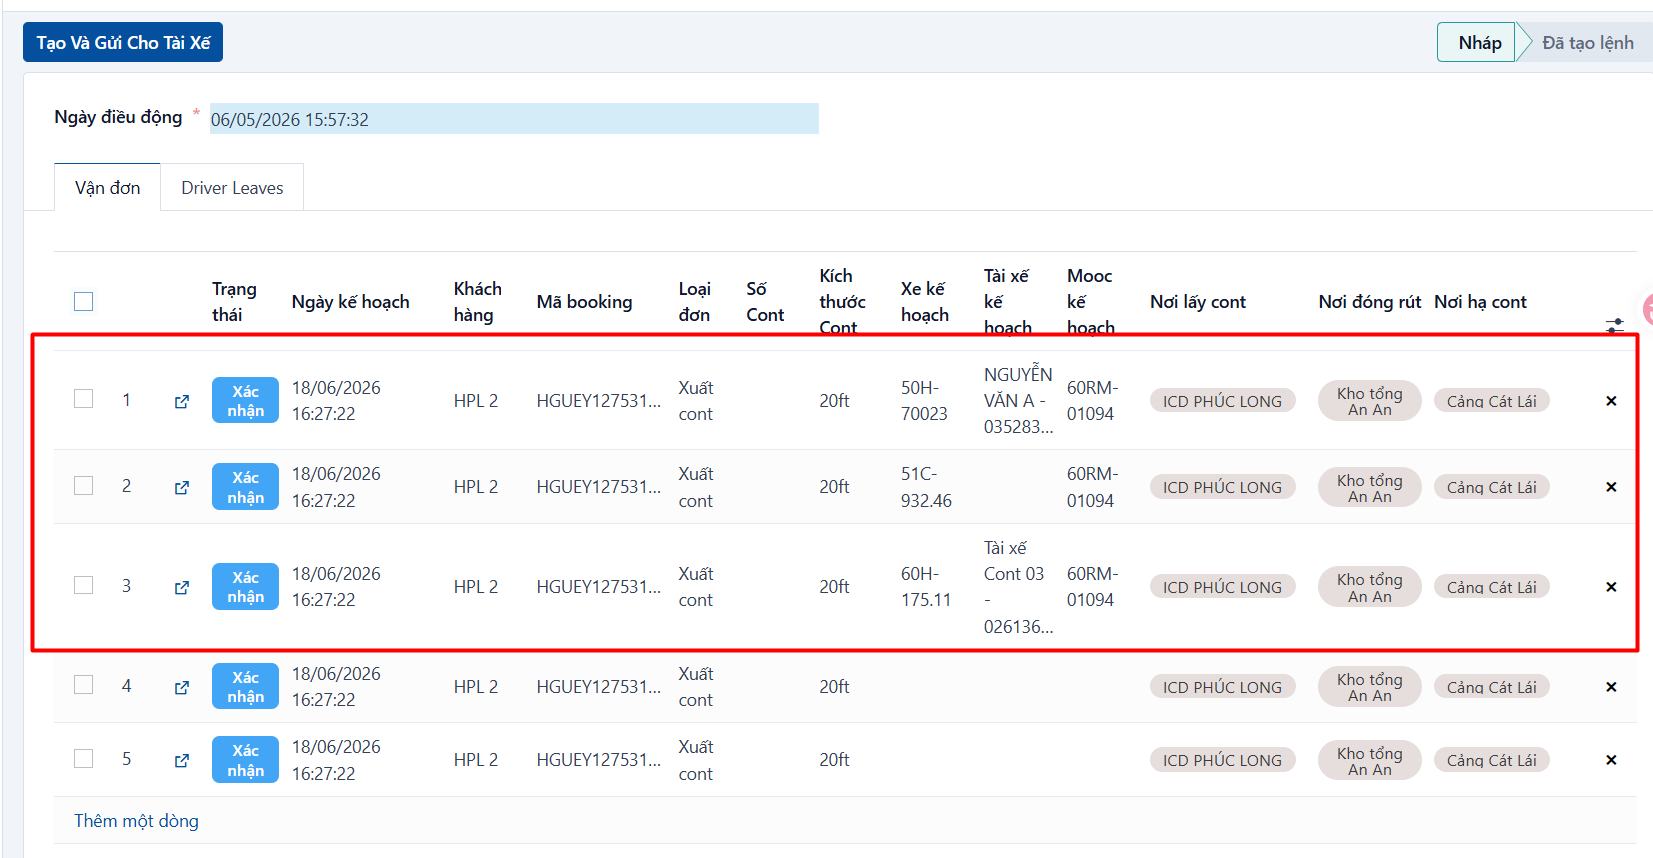
The system shows the dispatch planning screen as below.
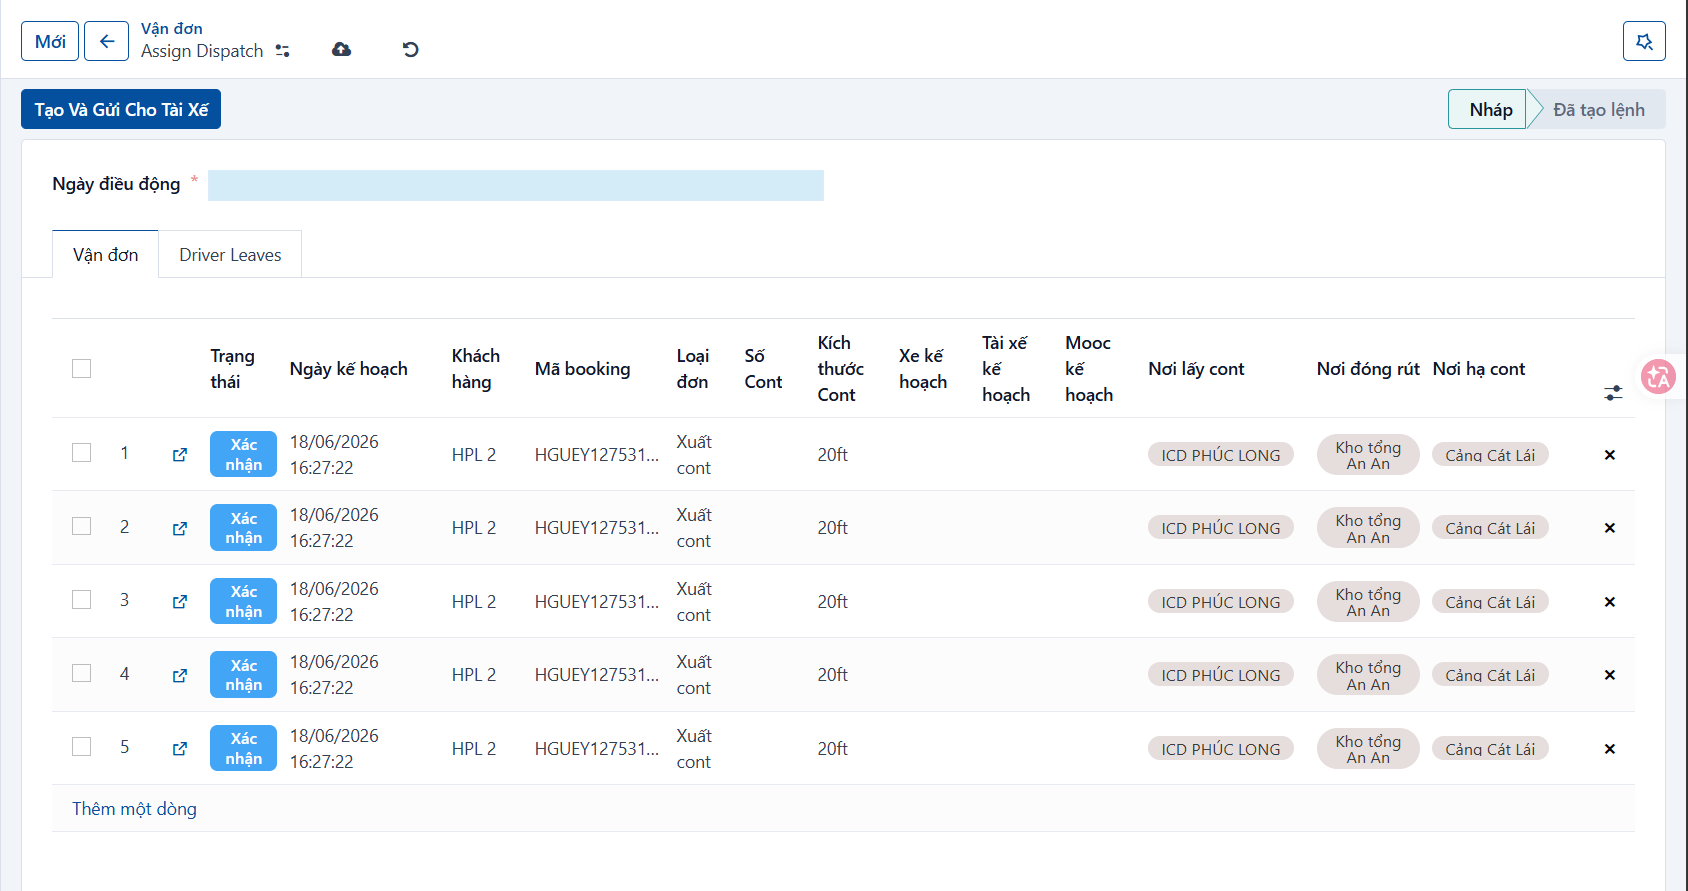
The image below shows the waybills selected for dispatch planning.
-
You can choose the dispatch date in the “Dispatch date” box to assign the orders to the same day.
-
The list shows a summary for each container — order details, locations, container number and so on — so the dispatcher can plan properly.
-
Click the “X” on a row to remove that container or waybill from the plan.
-
Click “Add a line” to open the waybill search popup and add another waybill to the plan.
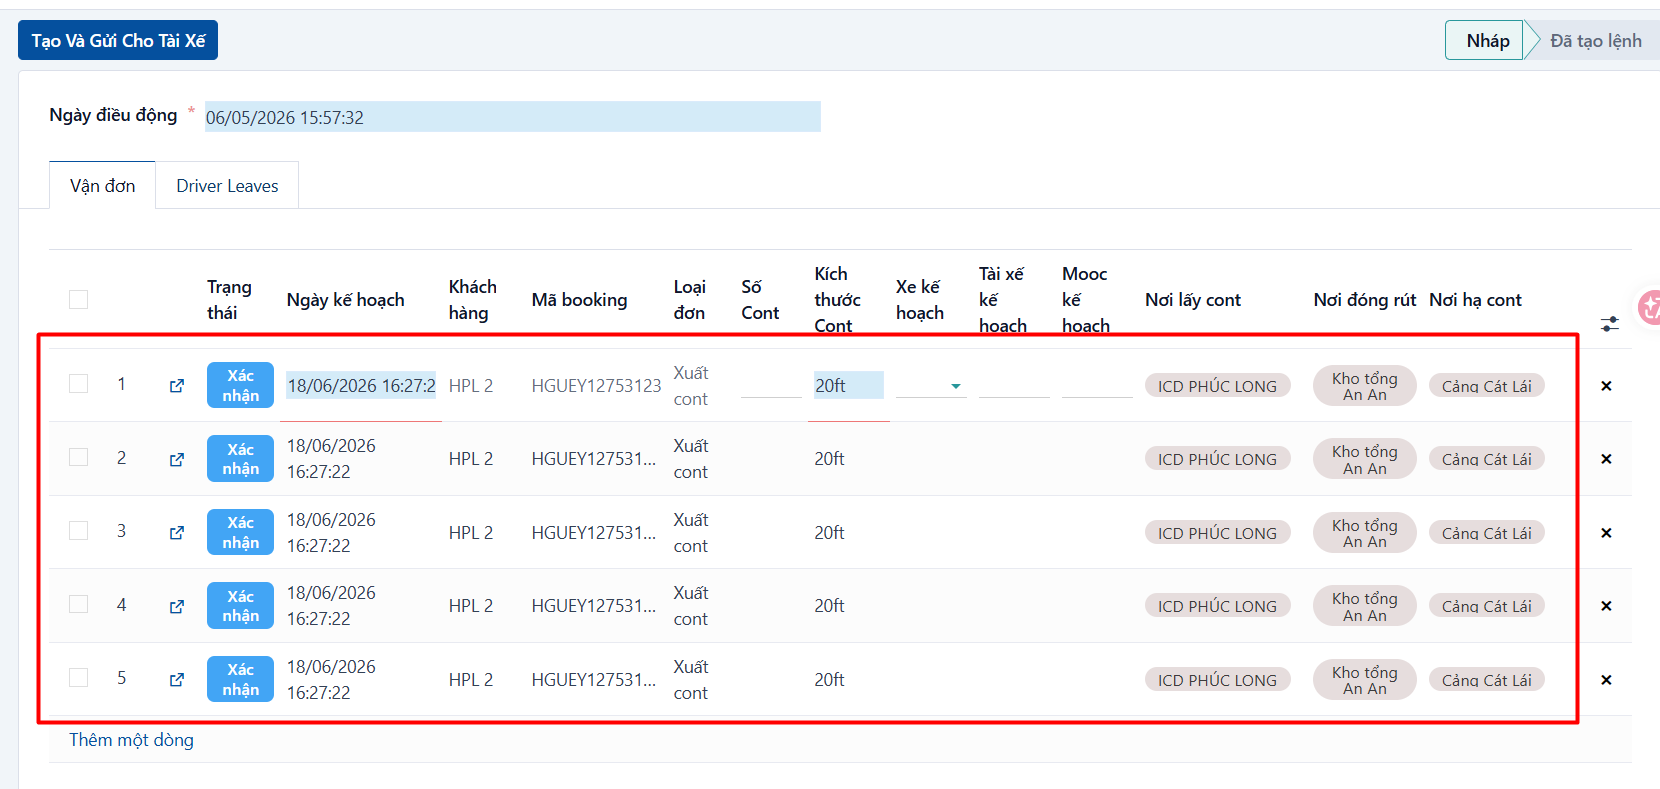
Fill in each row of the plan to assign a driver and a vehicle to the waybill:
-
Planned driver: select the driver being assigned.
-
Planned vehicle: when you select the driver, the system fills in that driver’s default vehicle. You can still choose another one.
-
Planned trailer: when you select the driver, the system fills in the default trailer for that driver’s vehicle. You can still choose another one.
-
Planned date: the system takes it from the planned date of the selected waybills. You can change it.
-
Container number: the system takes it from the container number of the selected waybills. You can change it.
-
Container size: the system takes it from the container size of the selected waybills. You can change it.
Step 3
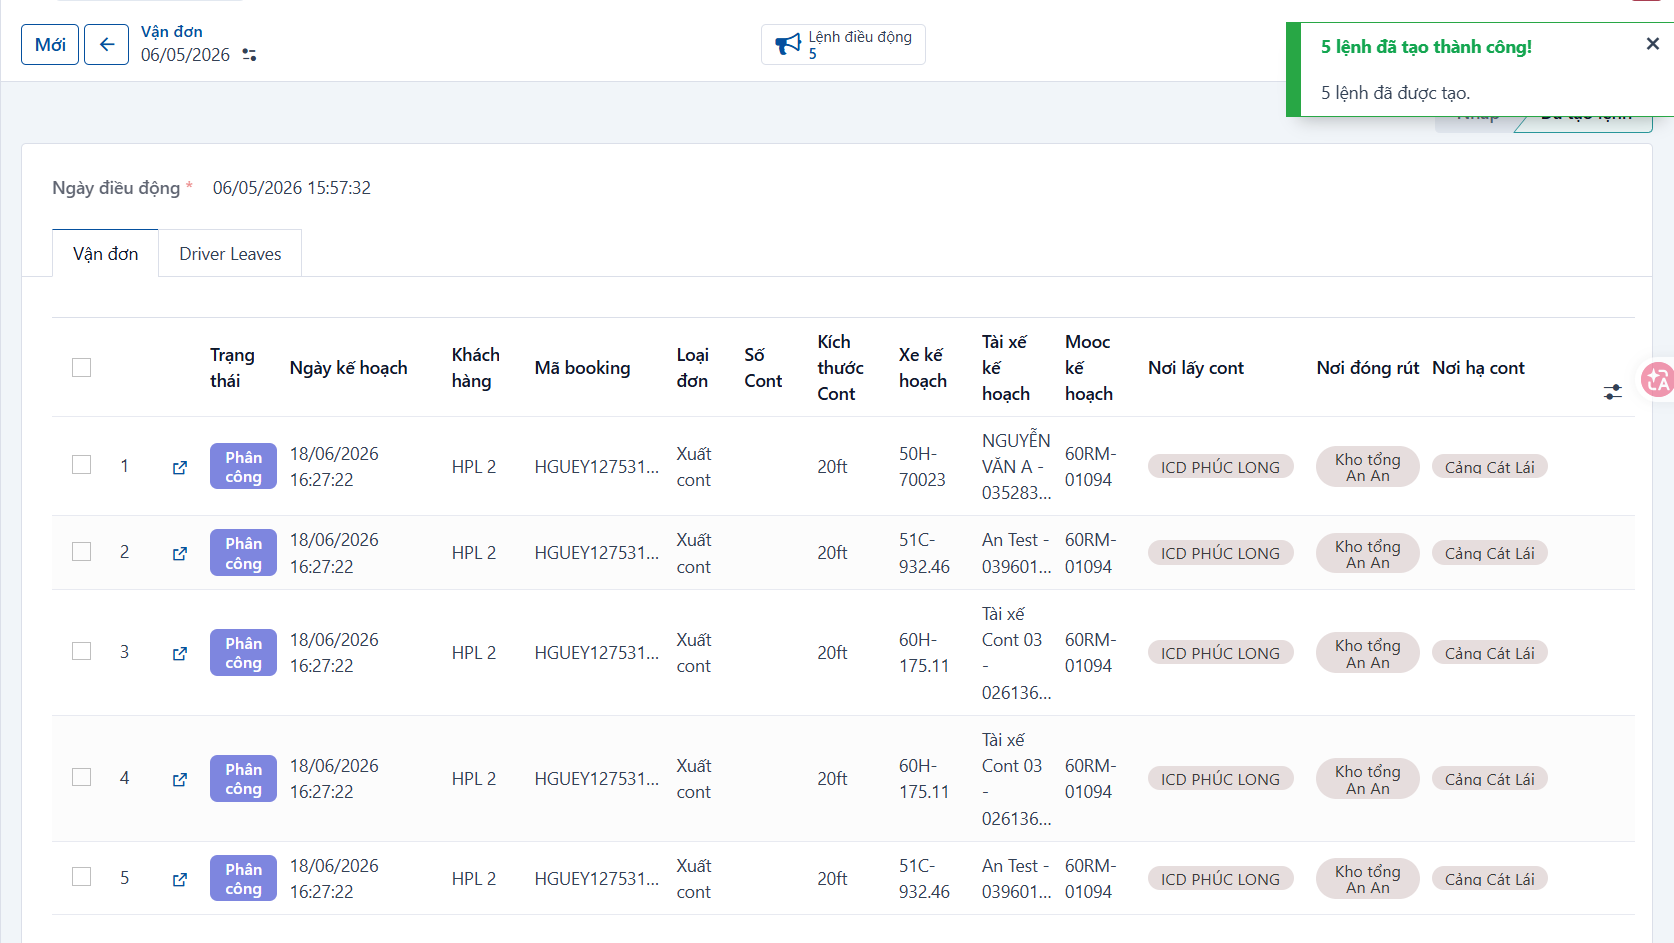
Once everything is filled in, click CREATE AND SEND TO DRIVER.
- The system creates a new dispatch order and sends it to the driver.