Ways to fill in waybill information
-
Option 1: fill in each waybill one at a time.
-
Option 2: use “Mass Edit” to update many waybills at once.
Option 1: one waybill at a time
- Step 1: open each waybill and enter the order and waybill information:
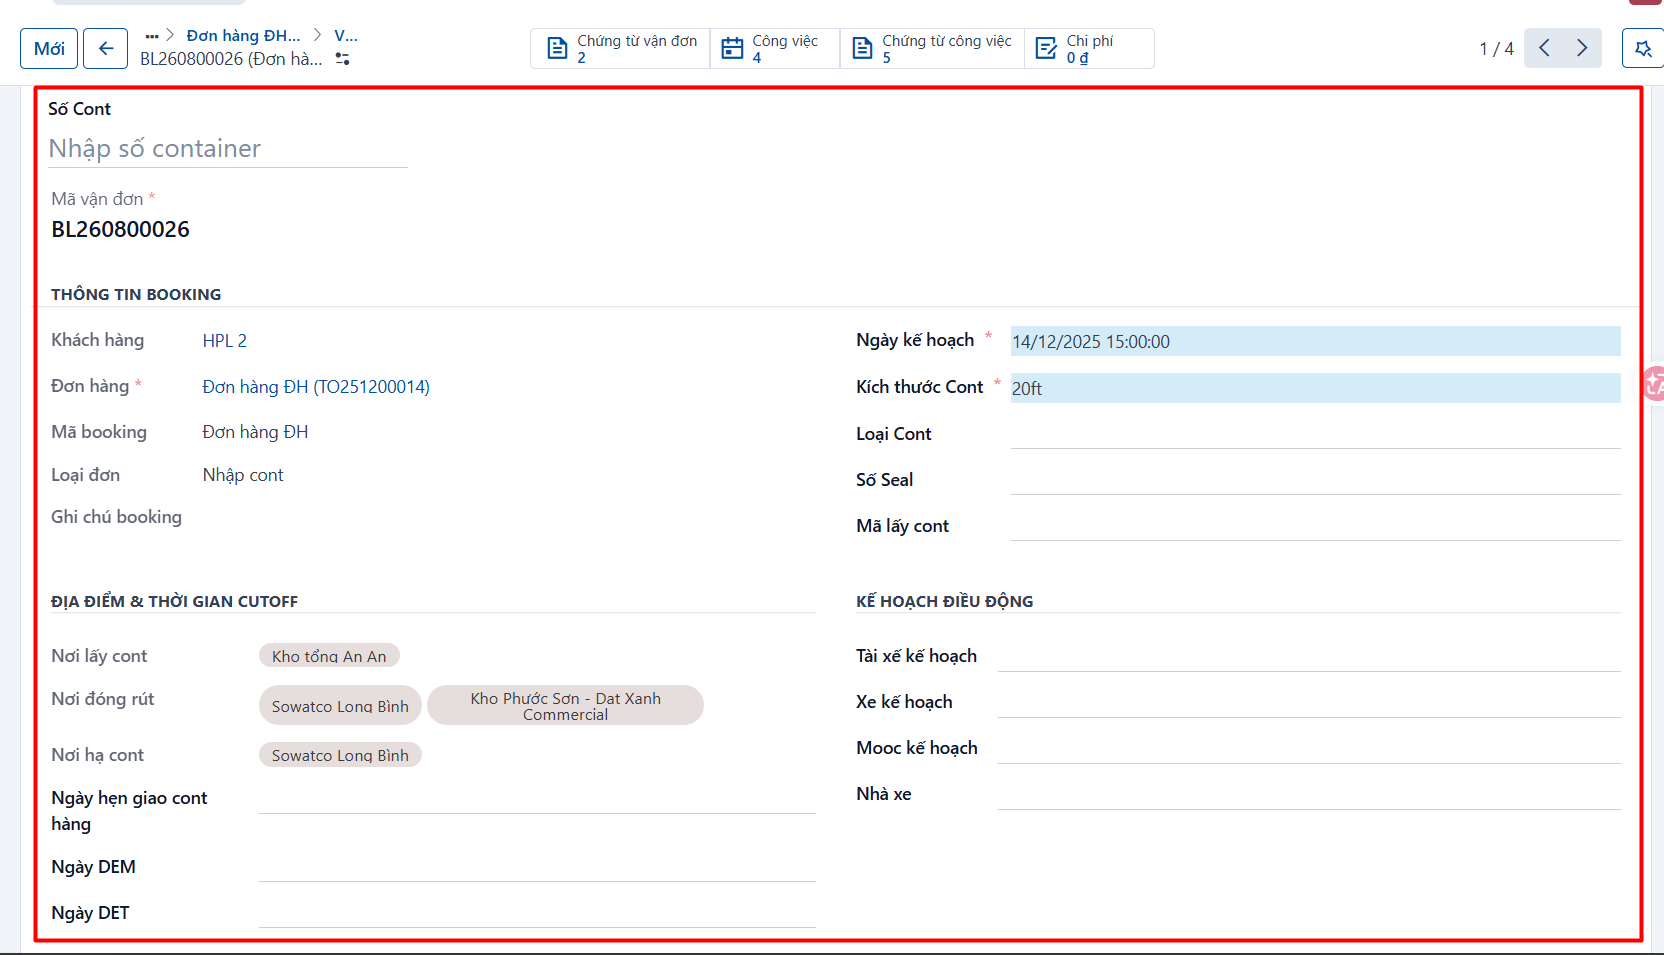
| Field | Description |
|---|---|
| Container number | Enter the container number for the “Import a full container” and “Move a laden container domestically” order types. For the “Export a full container” order type, the driver enters the container number in the mobile app and the system synchronises it back to TMS. The dispatcher can also enter it for them. |
| Waybill code | Leave this empty; the system generates it. |
| Customer | Leave this empty; the system takes it from the order. |
| Booking/Order | Leave this empty; the system takes it from the order. |
| Booking code | Leave this empty; the system takes it from the order. |
| Order type | Leave this empty; the system takes it from the order. |
| Booking note | Leave this empty; the system takes it from the order. You can change it. |
| Planned date | Leave this empty; the system takes it from the order. You can change it. |
| Container size | Leave this empty; the system selects it when the waybill is created from the order. You can change it. |
| Container type | Enter or search for the container type in the list. |
| Seal number | Enter the seal number for the “Import a full container” order type. For “Export a full container”, the driver enters it in the mobile app and the data is synchronised back to TMS. |
| Container pickup code | Enter the pickup code as a note for the driver collecting the container. |
| Container pickup place | Leave this empty; the system takes it from the order. |
| Stuffing/unstuffing place | Leave this empty; the system takes it from the order. |
| Container drop-off place | Leave this empty; the system takes it from the order. |
| Container delivery date | Leave this empty; the system takes it from the order. You can update it. |
| DEM / CY Cutoff date | The system shows either DEM or CY Cutoff depending on the order type. Leave this empty; the system takes it from the order. You can update it. |
| DET / SI Cutoff date | The system shows either DET or SI Cutoff depending on the order type. Leave this empty; the system takes it from the order. You can update it. |
| Planned driver | Select or search for the driver assigned to carry this container. |
| Planned vehicle | Select or search for the vehicle assigned to carry this container. |
| Planned trailer | Select or search for the trailer assigned to carry this container. |
| Carrier | Select or search for the carrier in charge, if a third party is carrying it for you. |
| Note for the carrier | Enter a note for the carrier taking the waybill — for example the PIN for collecting the laden container. |
- Step 2: enter the waybill notes:
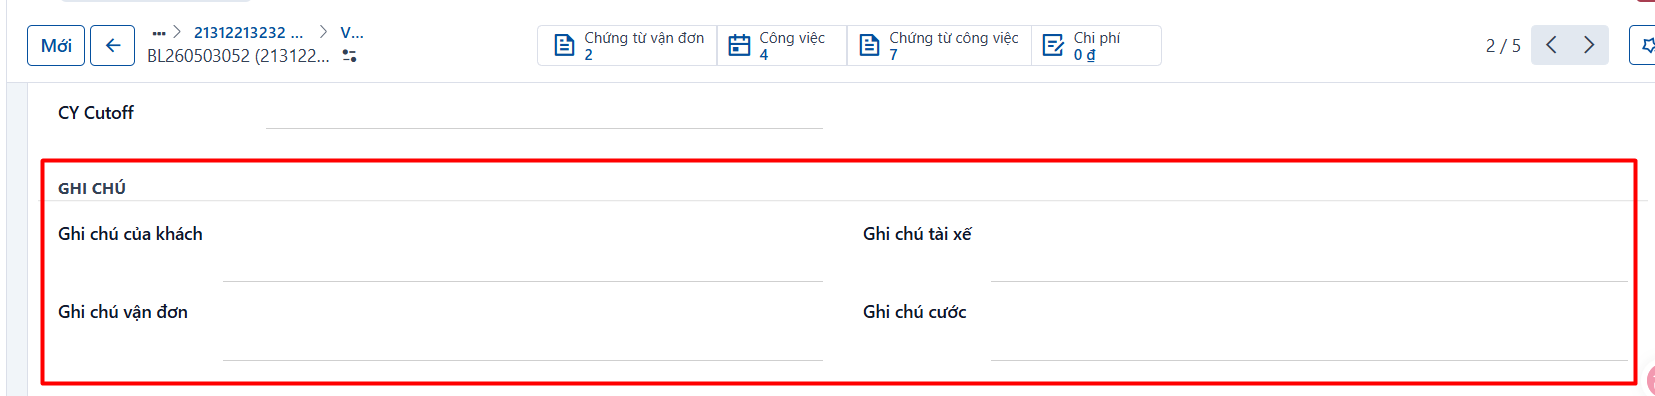
| Field | Description |
|---|---|
| Customer note | Enter the customer’s note for the container, if any. |
| Waybill note | Enter a note for the container or waybill, if any. |
| Note for the driver | Enter a note for the driver, if any — for example container requirements or the pickup time. |
| Freight note | Enter a note from the freight team about additional costs or other matters, if any. |
- Step 3: enter the cargo and customs declaration information:
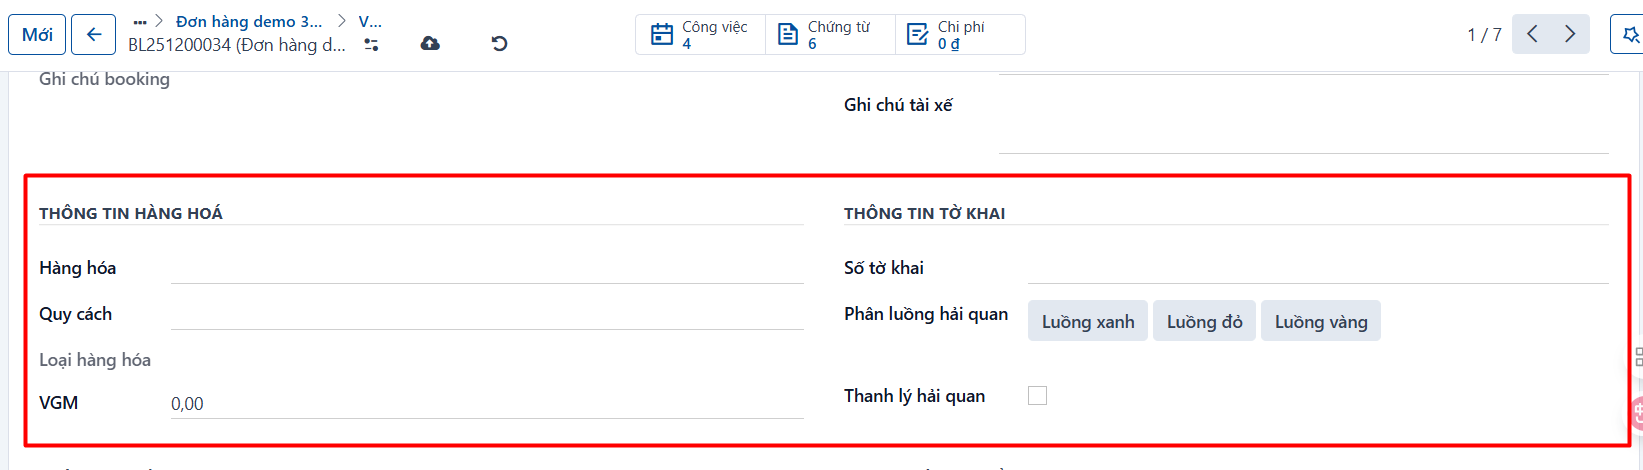
| Field | Description |
|---|---|
| Cargo | Select the type of cargo. |
| Packaging | Select the packaging specification for the cargo. |
| VGM | Enter the VGM. |
| Declaration number | Enter the customs declaration number. |
| Customs channel | Select the customs channel. |
| Customs cleared | Tick this once customs has been cleared. |
- Step 4: enter the port and container transfer information, if any:
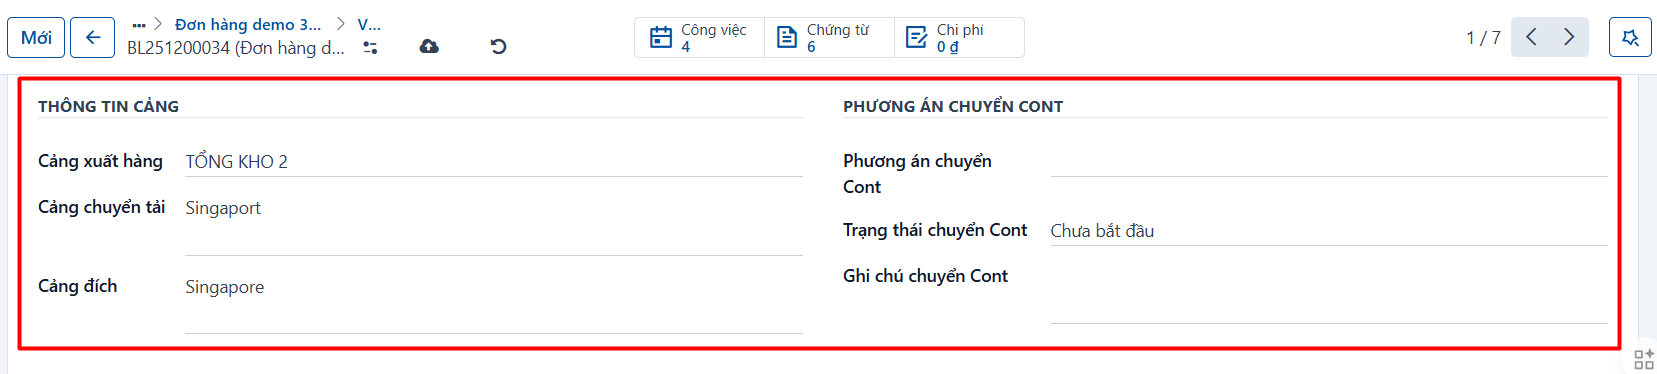
| Field | Description |
|---|---|
| Port of loading | Leave this empty; the system takes it from the order for reference. |
| Transshipment port | Leave this empty; the system takes it from the order for reference. |
| Port of destination | Leave this empty; the system takes it from the order for reference. |
| Container transfer option | The system takes the default from the order, but you can adjust it for each container and waybill. |
| Container transfer status | Three values: Not started (the default), In progress, Completed. While the container is being transferred between ports, you can update this to keep track. |
| Container transfer note | Enter a note about the transfer, if any. |
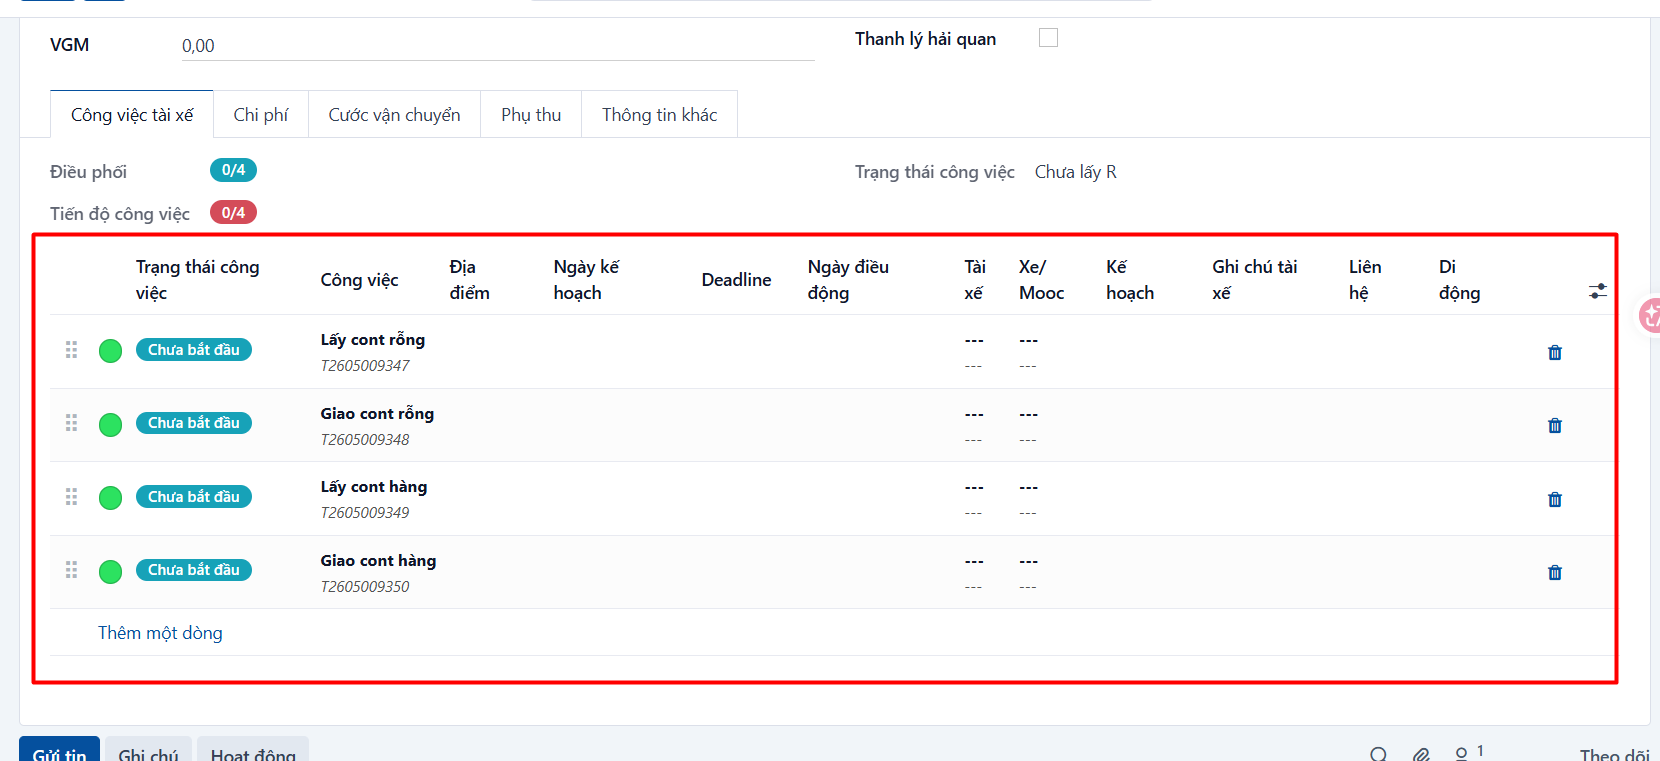
- Step 5: fill in the tasks of the waybill. This task table is created from the template task table on the order.
-
On the task table of each waybill you can:
-
Click “Add a line” to add a task.
-
Click the “Bin” icon at the end of a row to delete that task.
-
Click any row to see the details of that task.
-
Click the
 icon and drag to reorder the tasks.
-
-
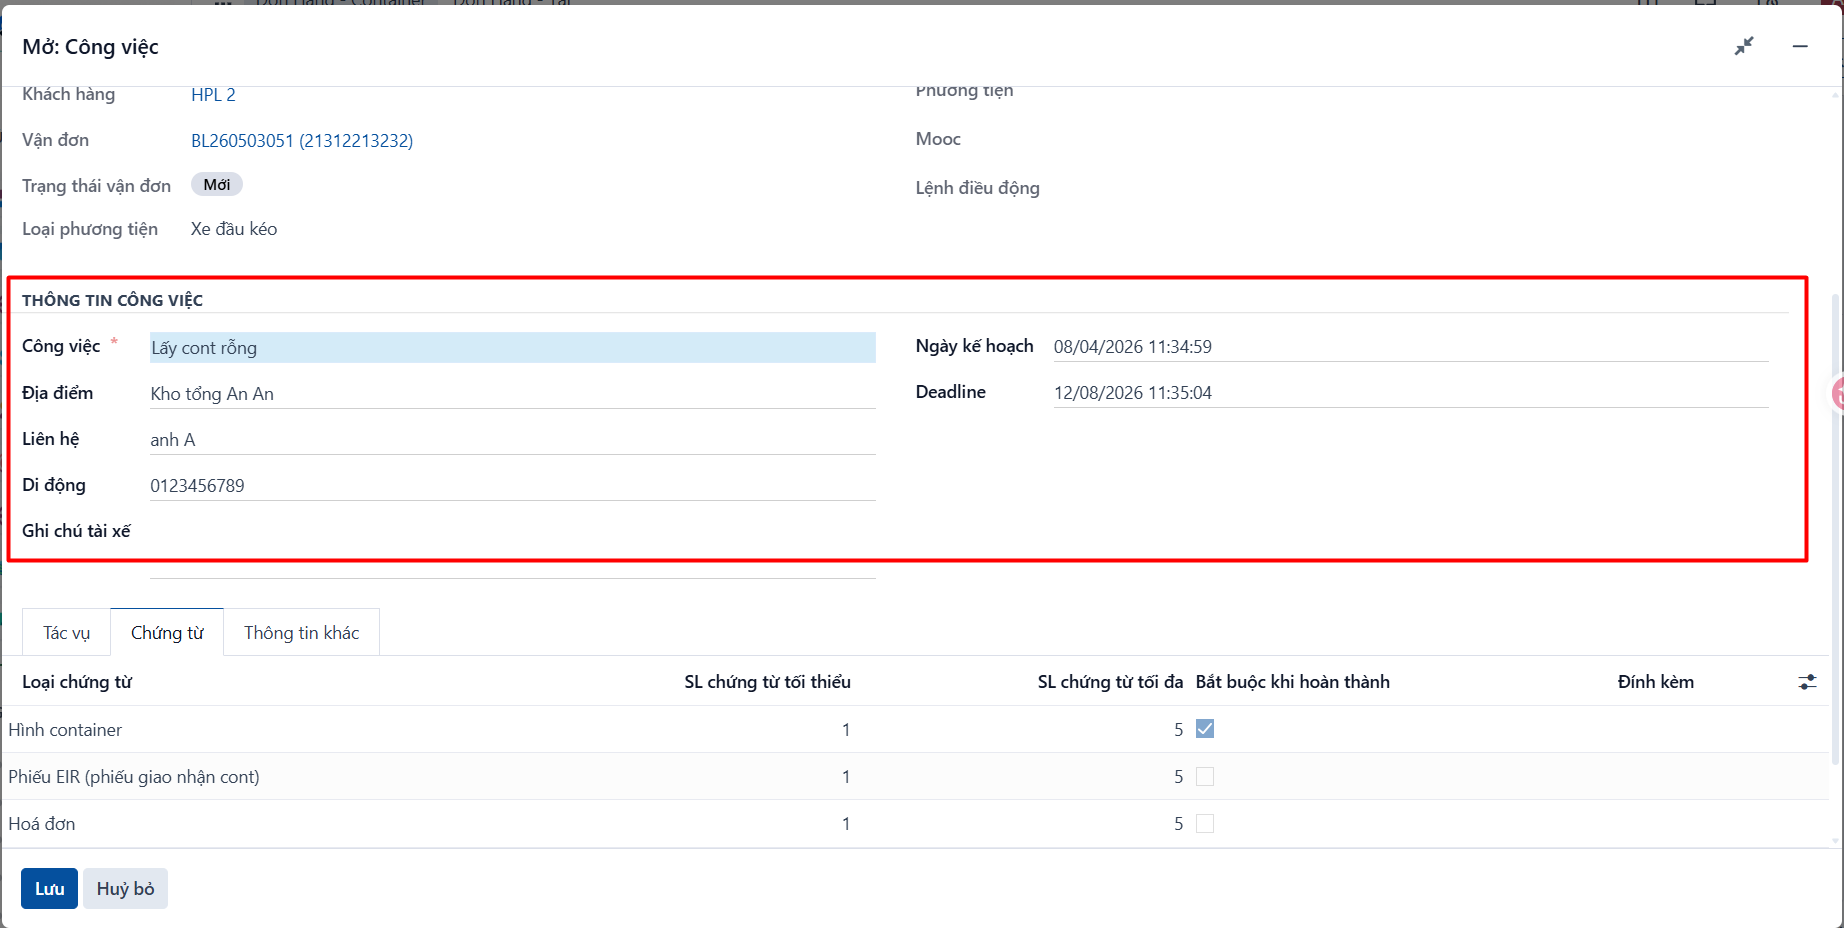
Enter the task information:
| Field | Description |
|---|---|
| Task code | The system generates this. Leave it empty. |
| Task | Name of the task. |
| Task status | How far along the task is. It changes as the driver works or the dispatcher updates it. |
| Location | Where the task is carried out. |
| Contact | The contact at that location. |
| Mobile | The contact’s phone number. |
| Note for the driver | A note for the driver, if any. It is shown in the mobile app. |
| Planned date | Enter the date you plan the driver to carry out the task. The dispatcher sets a date that makes dispatching work well. |
| Deadline | Enter the deadline from the paperwork, or one the dispatcher sets to keep track of the task. |
| Plan | The container plan at the customer’s warehouse. Applies to tasks such as “Deliver laden container” or “Drop off empty container” at a customer warehouse. The values are: drop container, detach trailer, store vehicle. This is also shown in the mobile app so the driver knows the plan. Whether this field appears depends on the configuration. |
- Step 6: click SAVE, or press CTRL + S, to save.